The boys on the Proto-Layouts list on IO were asking about salt weathering, so I thought I’d whip up a quick post on using the technique to weather freight car roofs.
I’ve used the technique successfully on a few models. Here’s one example:

The model above is a Sunshine Models 80-series kit of the Missouri Pacific 90000-series single sheathed box car. Here’s a link to the Sunshine Models flyer on Jim Hayes’ Sunshine Models website: http://sunshinekits.com/sunimages/sun80.pdf. Man, I wish I had a couple of those Sunshine Frisco cars right about now…
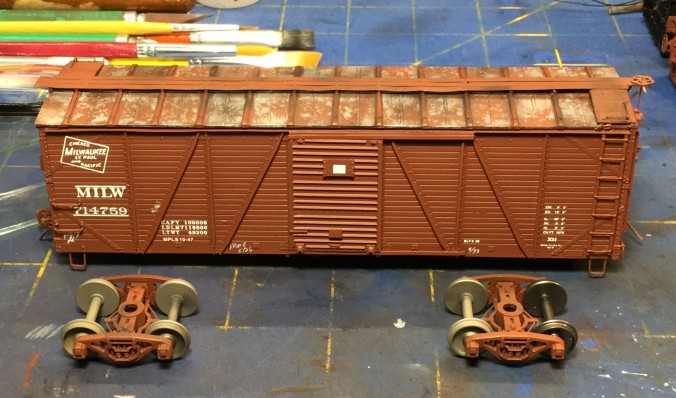
I recently applied salt weathering on a Sunshine Milwaukee Road box car that’s still under construction.
Here’s how to do it.
1 – First, paint the roof with the underlying rust or galvanized color. This is the color you want to “show through”. Usually this is a rust or galvanized color, or sometimes black. My choice for this car was a galvanized color; my homemade mix was about 80% white and 20% silver.
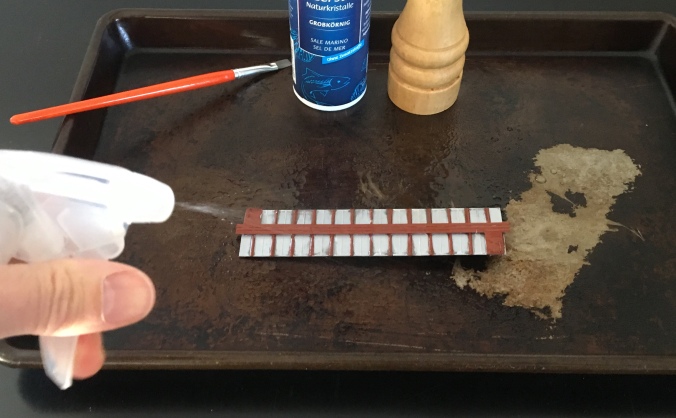
2 – Let the paint dry completely. Meanwhile, gather salt and rubbing alcohol. I use two kinds of salt (fine table salt, and coarse sea salt). I use a sprayer to apply the rubbing alcohol.

3 – Next, spray the roof with the rubbing alcohol. I understand most guys use water but I had a problem with surface tension and tried rubbing alcohol, and it was very effective. I put the roof in an old baking pan to contain the mess.
Note. I didn’t mask off the running board but it would’ve been smart to do that.
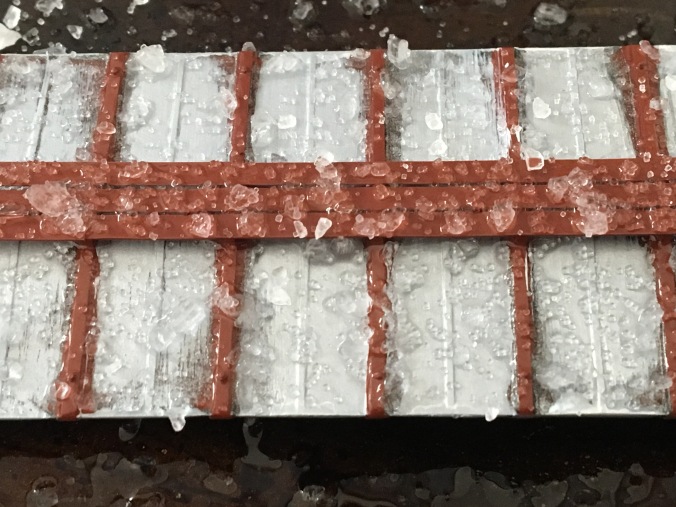
4 – While it’s wet, sprinkle on salt. I use two kinds of salt—tables salt (small granules) and Sea Salt (large chunks).
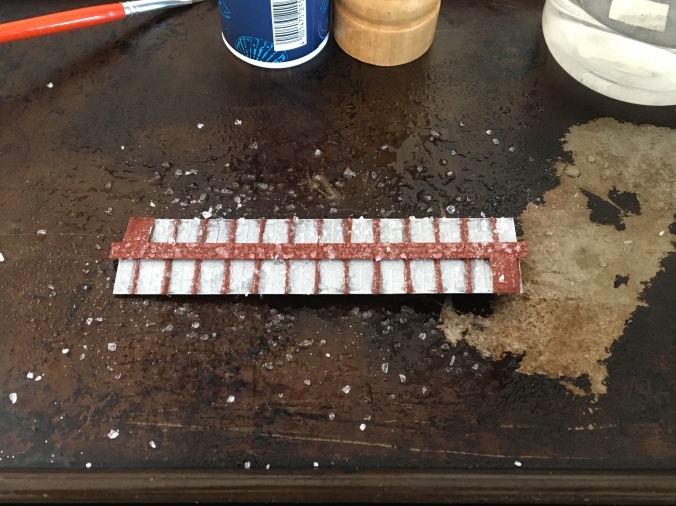
Here’s how it’ll look. Again, masking off the running board would’ve been smart.
5 – Let the whole mess dry completely.
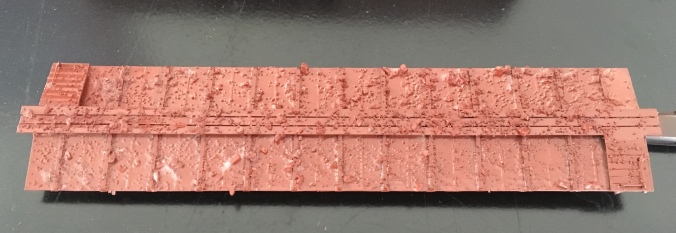
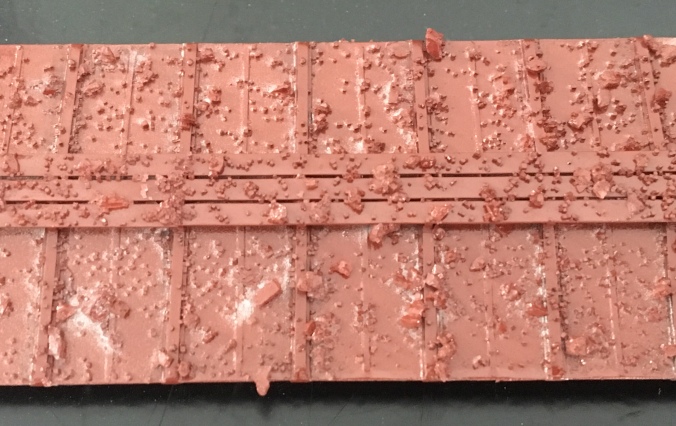
6 – Once dry, carefully airbrush the roof with the original car color (such as Box Car Red, or black). Yes, some of the salt will come off if you’re not careful when handling the roof.
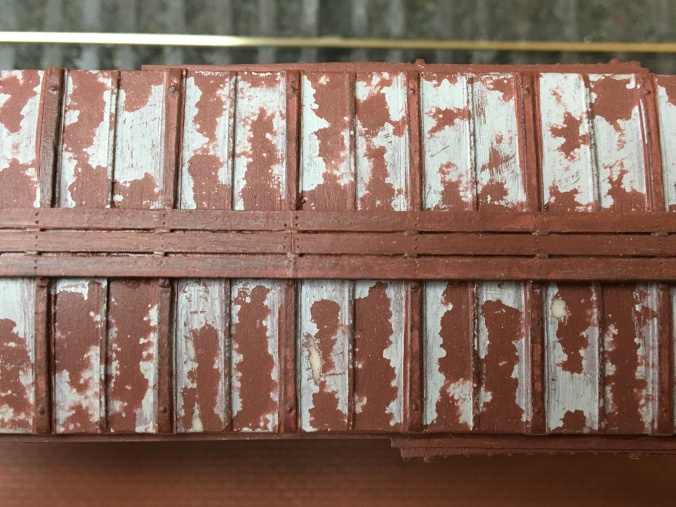
7 – After painting, this is how it’ll look. Let it dry completely.
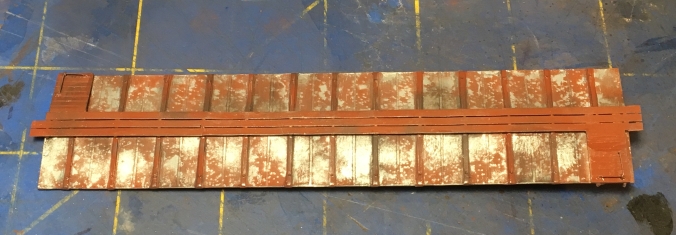
8 – When the paint is dry, rub off the salt. The color underneath will show up when the salt is removed. I didn’t take any photos of that process because it was too hard to do while holding a camera. Here’s how it looked, below, when all the salt was removed.

9 – Above. Next, go back over the running boards and seam caps with the original car color. This will provide a nice contrast between the weathered roof and the painted seam caps and running boards.
10 – Here’s how it’ll look–splotchy and irregular. That’s perfect. Next, you may want to go back over some areas with the original galvanized color and fill in a few spaces and gaps to blend everything together a little better. I used the little yellow brush to blend in the colors.
11 – Above. I also added a little black to simulate soot/dirt. I use AIM Powders applied with a small brush.

11 – Finally, to keep any delicate paint and especially the AIM powders in their place, I sealed the roof with a shot of Testors Dullcote.
And that’s it! If you’re going to try this, I recommend you practice on a few models first. The first time I tried salt weathering I finished three roofs–one was good, and two were “fails”. However, I learned how much salt to add, and where to add it, and that was really helpful for later attempts.
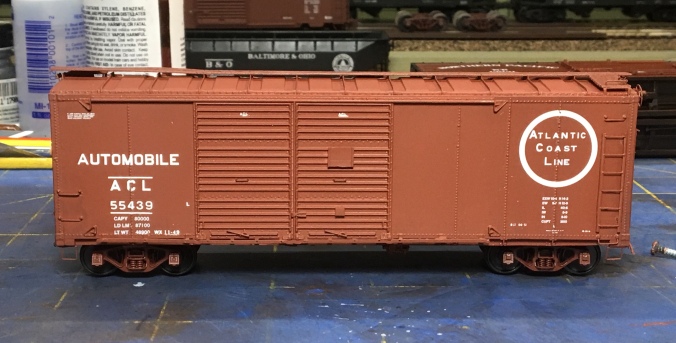
I’m still working on the rest of the car, as seen above, but should have it done this week. Meanwhile, below, I am also finishing up my Yarmouth ACL O-16-A auto car. Weathering is underway. This is a lovely model and I’ll post more on this later this week or next.
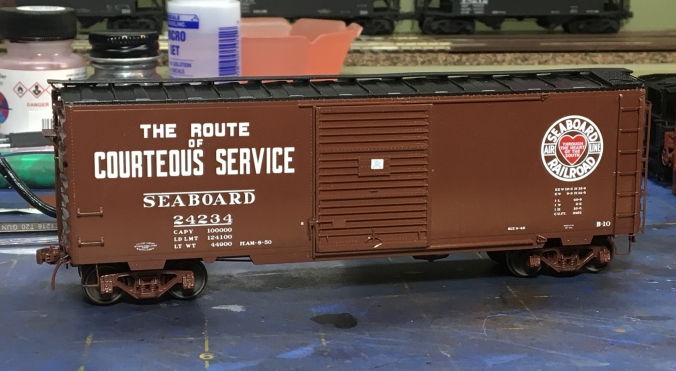
I’m also finishing up an antagonist to the ACL auto car above. Below, I have repainted my old Kadee SAL B-10 box car and decaled it with the new Speedwitch SAL B-10/AF-4 set. The decals are spectacular. The car needs a Superior door though, and that’s the next scratchbuilding project. I’ll post more on this car when I get the new doors built, painted and installed.
Enjoy your week! – John G

Using alcohol is a great hack. I have used distilled water but didn’t like the effect
Great job John
LikeLiked by 1 person
Thank you. Very ingenious . .
LikeLike