I’ve been working on a couple of New York Central ARA hopper cars off-and-on for a couple of years and finally finished them prior to traveling to the U.S. for St. Louis RPM last weekend. These two cars started as Kadee models and were finished with decals from Resin Car Works.

Through the 1950s New York Central was the second largest operator of freight cars in the U.S. In the 1950 Official Railway Equipment Register (ORER) for example, Central reported 132,957 freight cars of all types, second only to the Pennsylvania Railroad which reported over 193,000 cars that same year. Compare Central’s 132,000+-car fleet with other popular roads of the day—such as C&NW (45,990 cars), Union Pacific (44,687 cars), Seaboard (22,796 cars) or the often-reported Nickel Plate Road (15,300 cars)—and you’ll understand the importance of modeling the NYC car fleet appropriately.
Central owned many types of open hoppers, including 1,000 50-ton twin offset-side hoppers built to the 1935 ARA standard. These cars were built by Pressed Steel Co. in Lot 733-H and delivered in March 1945. They were assigned to the 867000-867999 number series. 
NYC 867399
NYC 867399 below is a stock Kadee model, which is a very accurate rendition of the NYC 867000-867999 series cars. I bought the model in 2010 decorated for NYC, but I replaced the kit trucks with Tahoe Model Works Double-Truss trucks and added Reboxx No. 33-2-1.015 wheelsets (the “2” is for “double insulated” wheelsets, required for Kadee’s all-metal trucks). I also added new repack and shop dates from Speedwitch decals’ NYC Box Car decal set.

A couple of years later when Resin Car Works released their NYC hopper car decal set, I really wanted to give them a try, and thought it would be a good way to obtain different car numbers than those offered by Kadee. Naturally I decided to repaint my factory-painted NYC cars, but it turns out it took me a long, long time to get them done.
NYC 867125
I began refinishing NYC 867399 by stripping the paint as seen below and lettering in my old North Coast sandblasting booth. After the model was stripped and washed, I airbrushed it with Tru Color NYC Freight Car Brown.

I also blasted the trucks (below), which are from Tahoe Model Works, and repainted them with Testors Gloss Black.

I was excited to try the RCW set because it includes good numbers and data for my modeling era, which is 1949-1950. However, as I started decaling the model, I quickly discovered that the numbers in the decal set are completely jumbled; in other words, there were no correct car numbers readily available in the set. I had to cut out each number individually.
So…as you can see below, I had to do all the decaling the hard way, installing lines and each number one-by-one, including the two-inch numbers on the car ends. I had to do three or four decal applications for each side. First I laid out the small lettering and lines to guide number placement, then I was able to add the letters and numbers and the rest of the lettering. Doing it this way isn’t hard but it takes a long time.

HereHere’s one close-up shot after decals were completed. The corners of the decals are very apparent. I think if I used newer setting solution they would’ve disappeared as expected.

Once the decaling was done I finished the model in the usual way, by applying Testros Dullcote, then a finishing coat, and then I weathered the model lightly with Testors Dark Tan sprayed with an airbrush. Later I brush-painted the model with Polly Scale Light Freight Car Red to bring out the highlights, added chalk marks with an artist’s pencil, and sealed everything one more time with another light coat of Dullcote.

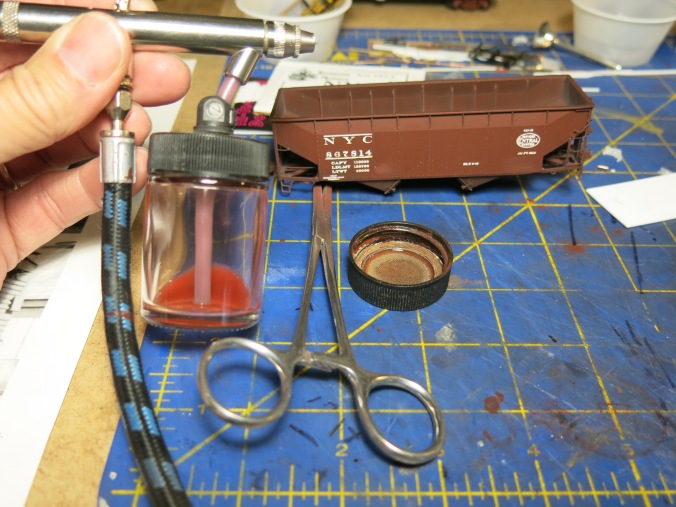
NYC 867814
The second car, NYC 867814, was also decaled last year but I was very unhappy with the decals. I am certain the decals did not settle properly because I was using a 15-20-year-old bottle of Micro Set. Look at those decal edges–they’re not settling as expected.

Meanwhile I tried to cover up the decal problems with a heavy coat of weathering. The weathering, as seen below, didn’t turn out very good. I just wasn’t happy with it.

Because it took so long to strip, repaint, decal and finish NYC 867125 above, I tried removing the weathering and refinishing the car. That was a good decision as I was able to reaccomplish the entire finishing process in just a few nights.
I began by removing most of the weathering with a fiberglass scraper tool. I bought this tool online from MicroMark, but they can be found cheaper. For example last week I bought two new tools from Jane’s Trees and Tools at St. Louis RPM for just five bucks each.

I lightly scraped off the weathering and then took off more weathering using a Q-tip dipped in MicroScale Micro Sol. During the process I scrubbed off the shop and repack dates, and also lost one of the car numbers. Repair to the grabs on each end of the car was easy–just a touch of ACC got each part back in position. After all the “heavy” work was done I washed the model in warm soapy water and that got most of the remaining junk off of it.

Below. I re-applied the missing car number and replaced a few other decals, then set the new decals with Micro Set.

The replacement decals applied perfectly with the new Micro Set. Then I gave the whole model a coat of Testors Dullcoat, and then blended the finish with a 50-50 mix of Testors Dullcote and paint thinner with a couple of drops of Scalecoat Oxide Red mixed in.
That final coat blends everything together nicely (below). Looks almost brand new!

Meanwhile I lightly weathered the trucks with AIM weathering powders and polished the wheel treads with a metal wire brush in my motor tool.

Then I brush-painted the car with the original car color, lightened up a shade or two with white paint, stroking the model up and down on each outside panel. I did not apply this weathering on the rivet belts. The idea was to give each panel a slightly different shade to make the details pop. I also gave the underside of the car a dirt-colored coating that I mixed and shot with an airbrush. The decals are hiding much better this time around…

Above. Then I used some black weathering powder and highlighted the rivet belts and details a little bit more. I normally don’t apply this kind of weathering to rivet belts but I was motivated by photo of a similar car shown below. When that was done I applied chalk marks using an artist’s pencil.

I sprayed the car again with Dullcoat to seal everything, then reapplied the trucks, cleaned the wheelset, and track-tested the model.
The completed model looks good–not over-done. The black weathering lines add an interesting change to my normal weathering patterns. It looks pretty right and I’m happy with it.

Resin Car Works decals can be found online at http://resincarworks.com/. – John G
